Setting up Continuous deployment from Visual Studio Team Service
Agile software development involves adaptive planning, rapid development, early delivery and continuous improvement of the product. It encourages rapid and flexible response to changes in the requirements of the envisioned product. All product stakeholders i.e., product delivery team, product owners, Analysts & various experts are directly involved in the development cycle, provide feedback(review) and collectively help in the evolution and success of the product.
This model demands the delivery/product development teams to frequently showcase(demo) the evolving product to the entire team. This delivery model is termed as Continuous delivery model.
Continuous delivery (CD) aims at building, testing, and releasing software faster and more frequently. The approach helps reduce the cost, time, and risk of delivering changes by allowing for more incremental updates to applications in production. A straightforward and repeatable deployment process is important for continuous delivery.
This requires development team to repeat certain mundane tasks like executing the unit tests, validating the results, building a deployment package for different environments like development/staging/UAT/production environment and deploying it with correct configurations to the respective environments. These activities became more and more frequent & consumed more time than it should take in the development cycle(sprints), and there by reducing the team's output.
To overcome this bottleneck condition, the source control systems(in early days, used as a mere backup & versioning software) were evolved into something much more and integrated with intelligent Build and Deploy systems like Jenkins, Travis, Microsoft build & Deploy tasks etc., that automates and removes this repetitive tasks from the developer's plate.
E.g., In Continuous Integration - When you check in or merge your code to Trunk/Main branch, this action can be configured as a trigger to an external build system that will automatically fetch the required packages from the server, perform all prerequisite changes as per the required target environment and build the source.
On successful build, the build system can auto run the Unit tests and validate the build. These successful build can be auto deployed to the development server for QA.
Once manually tested & approved by the Quality assurance team, the same package can be auto deployed to other server configurations with no manual interventions. This greatly reduces the time spent by the dev. resources on these tasks.
There are various SCM systems with integrated Build and Deploy services, these online services are either offered as commercial solution or free solutions with restrictions. The few more prominent once are
- GitHub that has integration with numerous automation tools & tasks is free for public, Open source projects. Private repositories requires premium subscription
- Visual Studio Team server comes as a complete pack with Microsoft's SCM, Build and deploy tools. It is free for teams size less than or equal to 5.
Note: The following discussion in this article is targeted more towards, how to deploy ASP.NET website on non-Azure hosting using continuous delivery model. Because, setting up a continuous Build and Deployment from GitHub or Visual Studio Team Service to Azure cloud services are very simple, and has lot of documentation & ready made connectors/templates already built by these service providers. You will barely face any issues.
But when you want to opt for deployment from VSTS to external hosting providers, it is NOT that simple. So in this article, I will explain how to setup the Continuous integration in VSTS and automate deployment to external hosting providers like GoDaddy.
With an assumption that you have already created a project in VSTS - First setup an automated CI(continuous inyegrated) build definition as follows
1) Select Build & Release from the top ribbon
![]()
2) Select Builds / Build Definitions, where you can define the steps for building your application
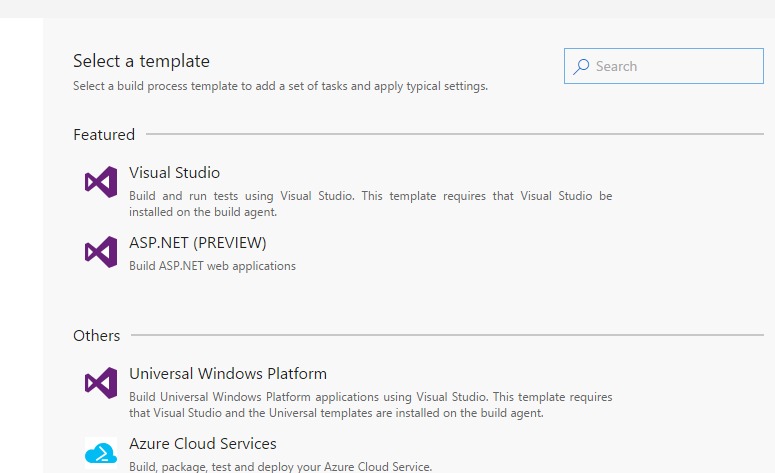
3) Select a suitable build template from pre-built templates that suits your requirement. (I have selected visual studio template for a reason, will explain in the latter part of article)
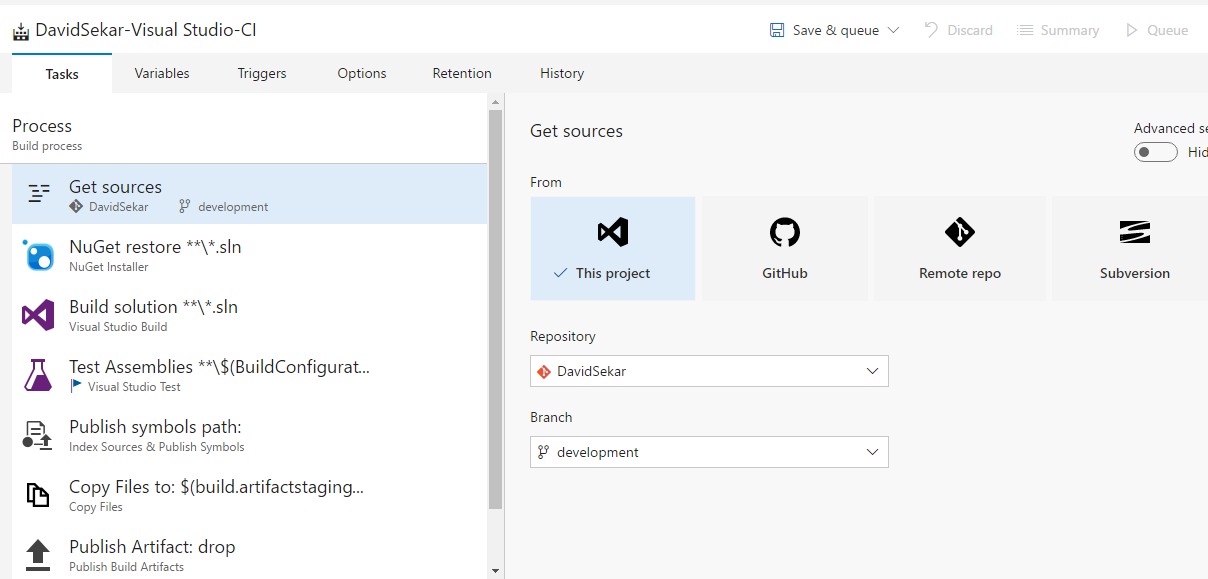
4) The selected template provides you an option to select the solution repository, which should be build. You can even configure external repositories like GitHub, BitBucket or any valid Git or SVN repos.
5) NuGet restore step will fetch all the external packages referred from the NuGet service.
Best practice : Avoid checking in the external libraries(dll) in the repository. Refer those from the NuGet store directly, helps to keep the CodeBase slim and clean.
6) Build Solution : Instruct MSBuild to package the files as a ZIP archive in the build drop folder/location.
Use following MSBuild arguments
/p:DeployOnBuild=true /p:WebPublishMethod=Package /p:PackageAsSingleFile=true /p:SkipInvalidConfigurations=true /p:PackageLocation="$(build.artifactstagingdirectory)\\"RELEASE MANAGEMENT :
VSTS offers really simple way for multiple teams to manage accepting changes to the environment they work on - in the release management.
Example : A QA team that tests the web application, can approve a deployment request to get the package auto deployed to the QA server. Similarly, we can have multiple application environments controlled by different team.
7) Select Build & Release > Release definition > Create
In the build definition, we've instructed team service to deployment package as a ZIP file.
There is no predefined web deployment release templates available. So install following MS deploy extension written using powershell script
https://marketplace.visualstudio.com/items?itemName=rschiefer.MSDeployAllTheThingsWeb Deploy Package : Select the package drop location
Destination Provider : Auto
Destination Computer : https://www.example.com:8172/msdeploy.axd?site=mysitename.com [Godaddy directly uses the site domain name]
AuthType : ntlm
Username : username
Password : password
