VSTS build and release definitions for Godaddy hosting
Visual Studio Team Services is offered as an easy to use Saas (Software as a Service) on cloud systems to
- maintain your code base
- manage your agile projects
- build and release artifacts with full control
You can try out the entire service flow by signing into the VSTS online portal for free - https://visualstudio.microsoft.com/vso/. This service is offered free for smaller teams with number of participants less than 5. I recommend it, because I've been highly satisfied using its simple flow for my personal web application development & deployment for more than 2 years without any hiccups.
This article is a continuation of earlier post on - HOW TO SETUP VSTS CONTINUOUS DEPLOYMENT FOR GODADDY, which highlights various options to enable continuous deployment to GoDaddy hosting servers and limitations with that provider. For most other providers, those options/methods suggested would work straight away, but not for GoDaddy,..
Finally, in that article we've settled down with an workaround for building and deploying the application to GoDaddy during build pipeline... Missing out the features of Release Pipeline like control to approve and release it to multiple servers[environments] or rollback to a particular release version.
After couple of successful years using the workaround... Finally I decided to revisit my release strategy and tried-out if, I could get this release setup in a proper way. I'm quite happy as I could get it working this time. I will explain both build and release definition for article completion.
Setting up the code repository:
There are two flavours of source control systems offered by VSTS - * GIT (distributed) and * TFVC (Centralized). After Microsoft's Github acquisition, GIT has become the default repository for the newer project. In-case you need TFVC, you can add it as a part of GIT project. So to start create a GIT repository
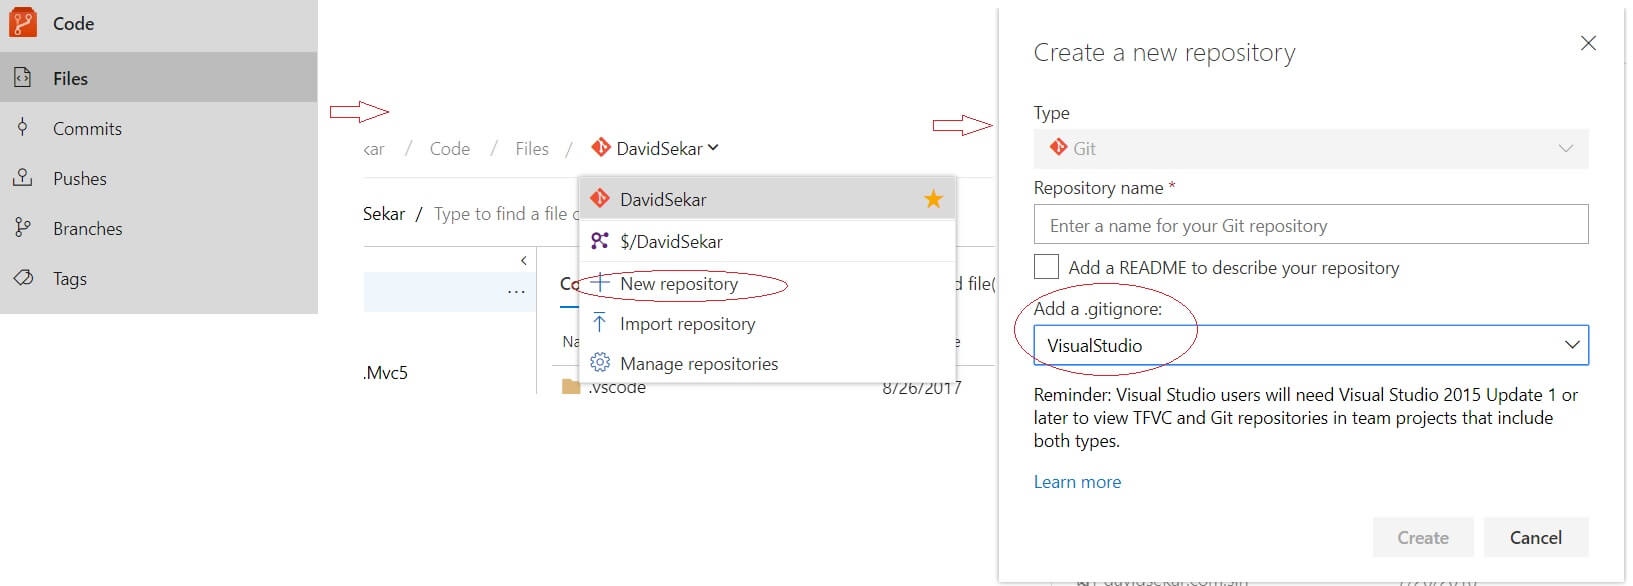
It also provides you with an option to select an IDE, which you'll use for development. Based on your IDE selection, it will automatically add the .gitignore patterns to exclude the IDE temp files.
Once the repository is created, you can clone the repository on your local system using the VSTS account.
Setting up build definition:
VSTS online offers the build system to build different types of projects from different repository sources.
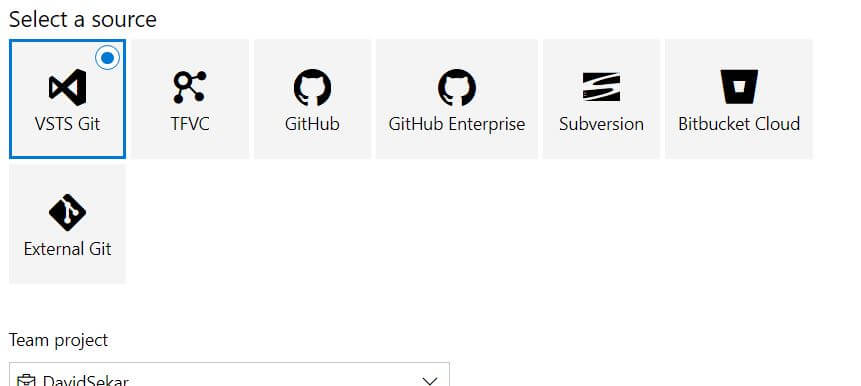
For my personal website that is based on the ASP.Net, I've selected ASP.Net application template which comes pre-defined with the tasks like Nuget restore, Build Solution, Test Solution and Publish build artifacts.
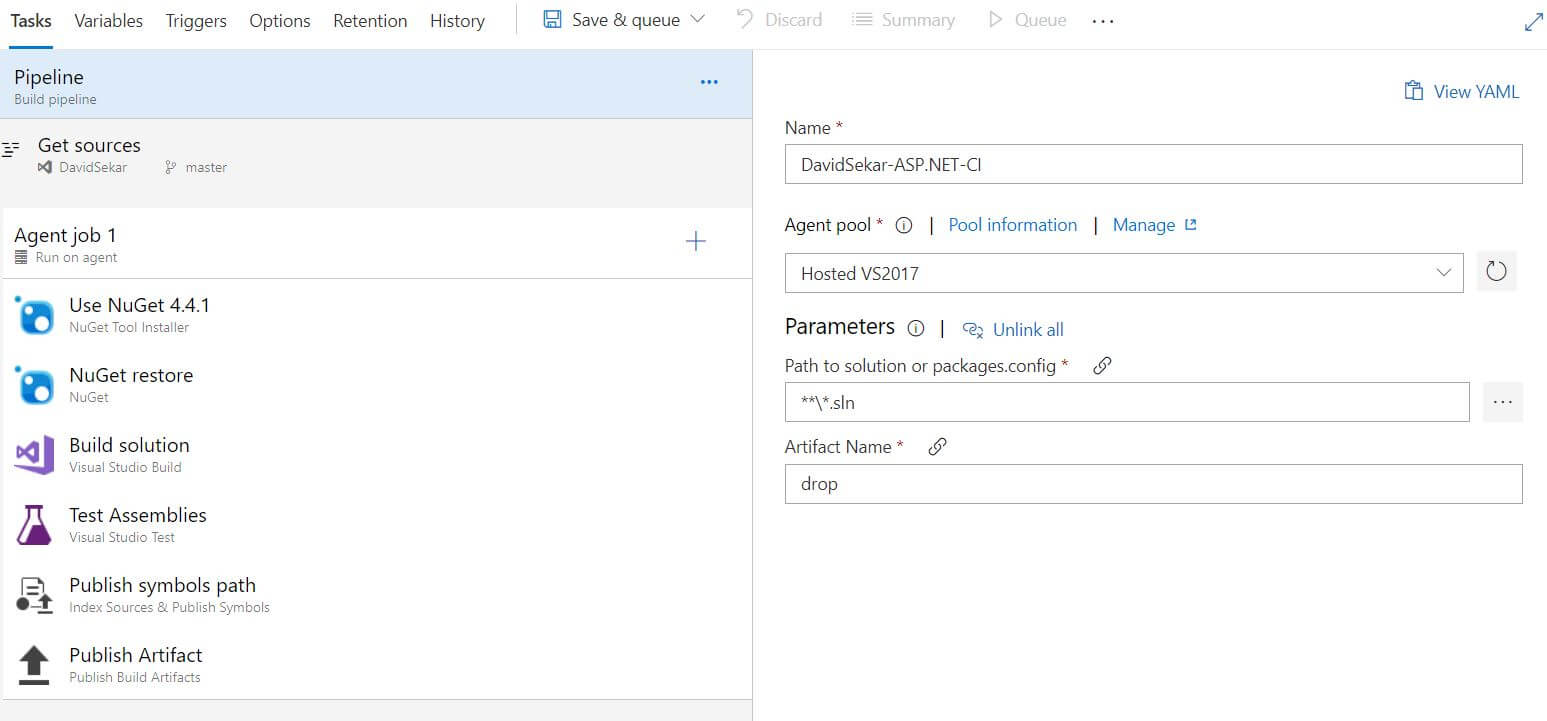
In the build solution step,
select the location of your .sln file from the root folder (you can use patterns to select the solution file). Specify following as the MSBUILD arguments to create a single build artifact/package.
/p:DeployOnBuild=true /p:WebPublishMethod=Package /p:PackageAsSingleFile=true /p:SkipInvalidConfigurations=true /p:PackageLocation="$(build.artifactstagingdirectory)\\"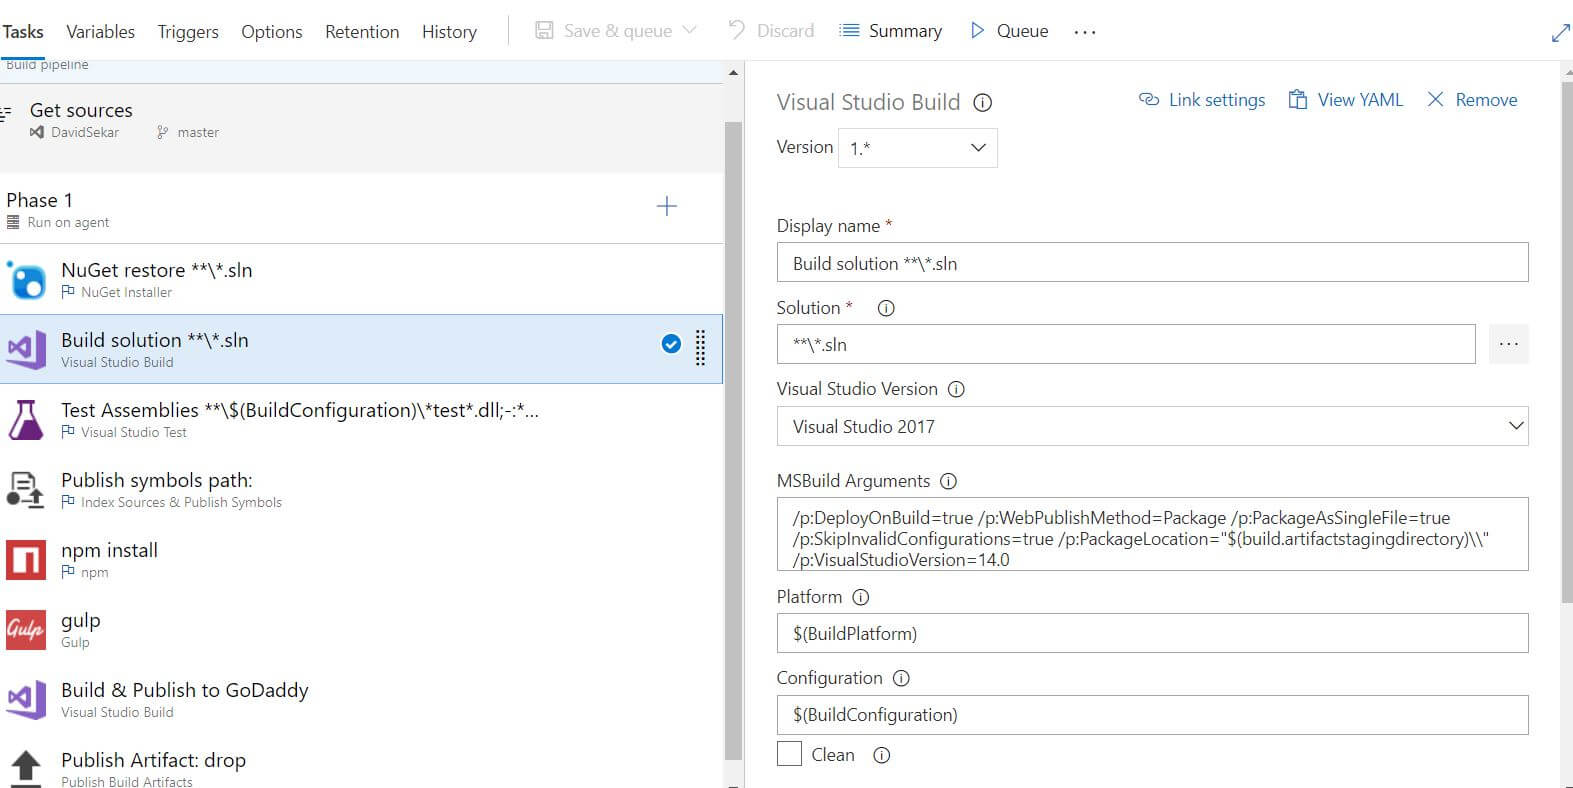
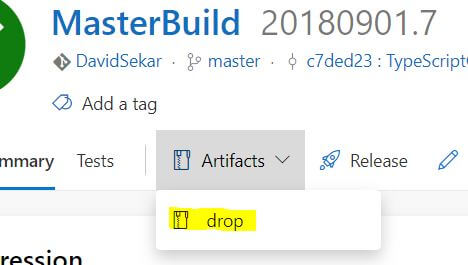
Running a build would create a build artifact, which can be download from the particular build version history and verified on your local machine.
Setting up release definition:
Once the build artifacts are as expected, we will now setup a release definition which will publish the artifact files to the GoDaddy servers.
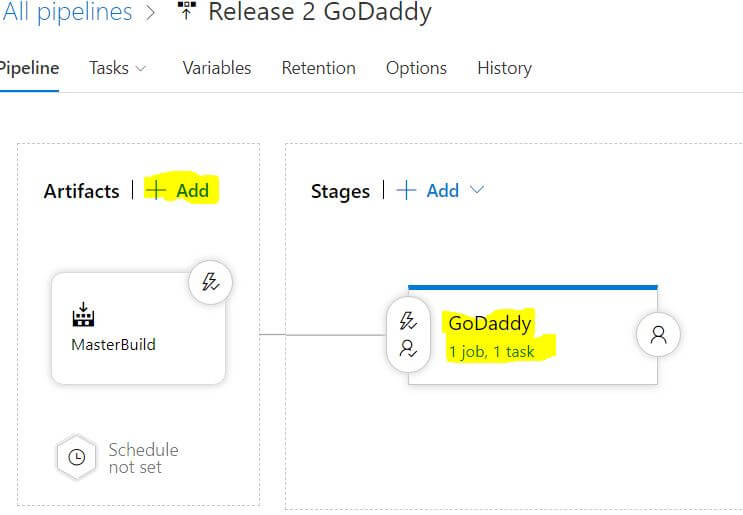
Go to release definition tab >> click on create a release pipeline >> Select empty Job template.
- select the build artifact based on the build definition name
- add stage as 'GoDaddy' with no sub-tasks, because we will select the required deploy task in the next step
If needed,
- select release creation trigger either as manual or automatically after a successful build
- You can add a pre-deployment approver, to authorize deployment to GoDaddy server
Search and add 'MsDeploy Package Sync' task from the available deploy tasks.

Next is the critical part that was a hurdle for a long time, which I could luckily resolve this time.
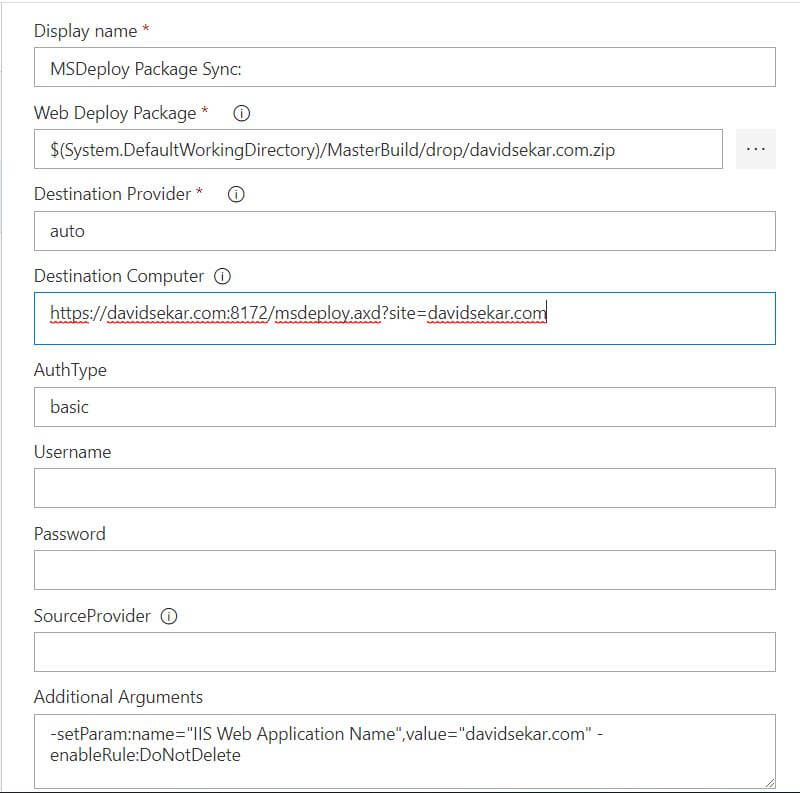
GoDaddy has enabled msdeploy service through handler, so you need to set the destination computer in the following format
https://domainname_alt.com:8172/msdeploy.axd?site=domainname.comComputerName: domainname_alt refers to a non-CDN enabled domain name, as Cloudflare CDN caused issue with my setup. You can setup the alternate CDN-Free domain name in the Cloudflare portal or in the GoDaddy DNS manager.
For username and password, download the publish profile from the Plesk Admin (GoDaddy Portal Admin) and use that credentials for authorization. (This will be same as the first default username & password that you've set for the FTP transfer)
Finally in the additional parameters, specify the application name that you see in your publish profile that you can access from the GoDaddy Admin.
Set -enableRule:DoNotDelete : This avoids deleting the extra files on the destination server during webdeploy sync operation. I wanted to highlight this rule in particular, because during the release definition tryouts many of my required files like article images were wiped out of my destination site ![]() .
.
So following above definitions/tasks would allow you to complete the Continuous Deployment (CD) from VSTS server to GoDaddy hosting provider.
Hope this solution save you lot of money and time. Share your thoughts/feedbacks through comments.
